Finger Painting with Polishing Plaster!
- nicolemartel6542
- May 29, 2024
- 1 min read
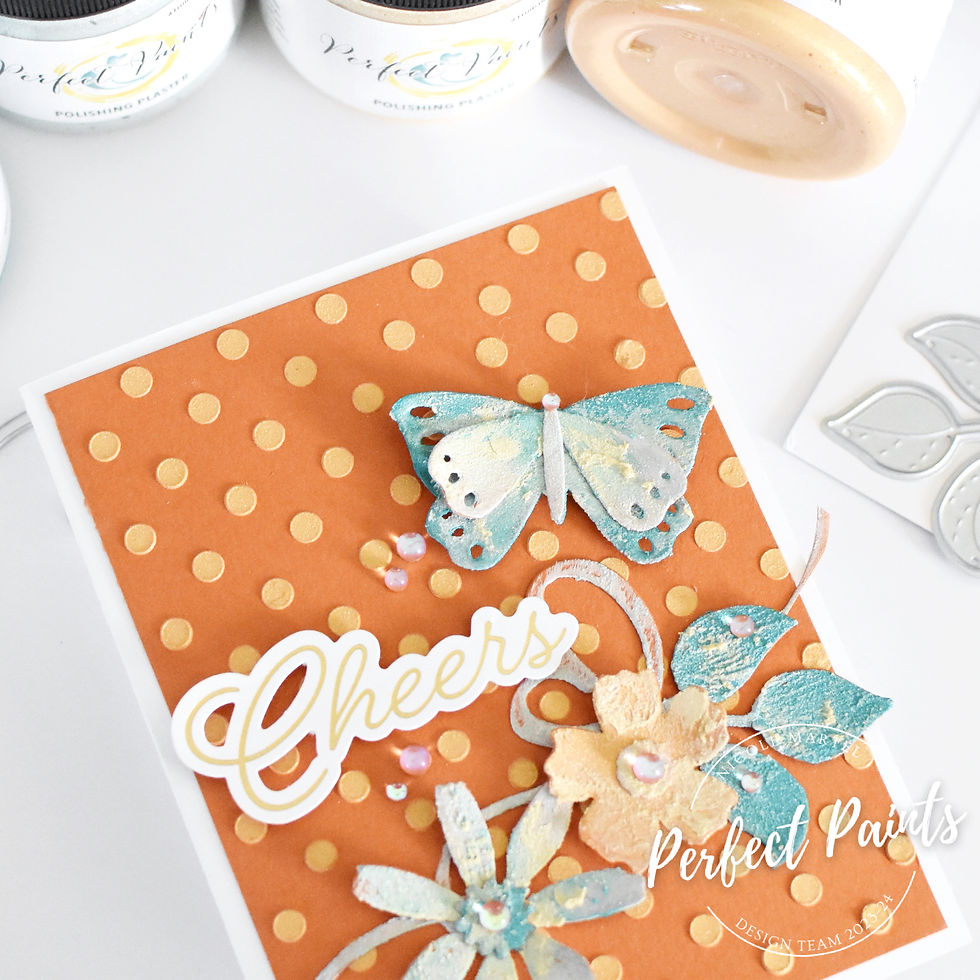
Hello, Nicole here with a mixed media card I created for a friend's birthday! Today, I'm sharing a card I created using Polishing Plaster to color Garden Flowers cut from metal dies! I did a little finger painting and it was super fun!

To begin, I added some polka dots on orange cardstock using Polishing Plaster and a polka dot stencil. Next, I used the Garden Flowers Die Set to cut out from orange cardstock.

Next, I had to decide what Polishing Plaster colors I wanted to use! I decided to go with a few different colors that would layer together nicely! I decided to use Jack Frost, Mexican Turquoise, Organic Sugar, and Radiant Sun!

After I chosed my colors, I opened all of the jars and started adding the Polishing Plaster all over the die cut pieces using my fingers.


I just love painting with my fingers!! It's so soothing. :) What do you think? Do you prefer not to get messy?

Aren't these lovely? I just love all the texture! Are you ready to play with some Polishing Plaster to add texture to your dies? They are super fun!!


To complete the card, I mounted the dies down using glue and foam squares to add dimension. I hope I inspired you today! I think it's time for me to play with something different... I'm going to pull out my acrylics next month! I'm sure I can come up with some fun ways to use acrylics. Thank you so much for visiting today!
Nicole


Comments